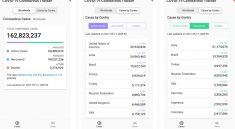
auto_screenshot grabs screenshots from your Flutter app on mobile platforms (iOS and Android).
It has two parts:
- A command-line wrapper over Flutter’s integration_test package that lets you specify which
emulators to run on, then runs them on your machine while you make pancakes or whatever. - Library methods that let you insert screenshot-taking commands into your integration tests
with a single line of code.
Seed data is supported. If you use go_router, you can specify a test very easily.
Getting started
You’ll need to have the following installed, with the indicated binaries available in your PATH:
- Flutter –
flutter - xcode (only available on MacOS) –
xcrun - Simulator (comes bundled with xcode)
- Android SDK Command-Line Tools –
emulator - Java –
java
To install, add auto_screenshot to your dev_dependencies in pubspec.yaml.
(Run flutter pub get if your IDE doesn’t do it for you.)
If you don’t have integration tests yet, follow the instructions at
https://docs.flutter.dev/cookbook/testing/integration/introduction.
Commands
dart run auto_screenshot: Starts booting up simulators, running integration tests, and collecting screenshots. Make sure you don’t have any simulators already running. auto_screenshot will start them as needed and close them when it’s finished.dart run auto_screenshot:list_devices: Lists all the valid device names you can use in the auto_screenshot configuration.dart run auto_screenshot:validate: Validates your auto_screenshot configuration without running any tests.
Configuration
Add a section like the following to your pubspec.yaml:
auto_screenshot:
  devices:
    - iPhone 8 Plus
    - iPhone 13 Pro Max
    - iPad Pro (12.9-inch) (2nd generation)
    - iPad Pro (12.9-inch) (5th generation)
    - Pixel_3a_API_33_arm64-v8a
    - Pixel_5_API_33
If your integration tests are in <project root>/integration_test and you want screenshots to be
written to <project root>/auto_screenshot, that’s all the configuration you need.
devices– (required) an array of device names. These must be exact and not contain any typos. You can get
a list of valid device names by runningdart run auto_screenshot:list_devices. This assumes you’ve already installed/created the simulators you want to use, though they shouldn’t be running while you’re using auto_screenshot.test_path– (optional) path from the project root to your integration test folder OR file. Defaults tointegration_test.output_folder– (optional) path from the project root to the desired screenshot output folder. Defaults
toauto_screenshot.
Usage
WIP…
Support
Issues are welcome. Please don’t ask me to increase the scope of this project unless you’re willing to do the work, file the PRs, and join the maintenance team. auto_screenshot is meant to run on MacOS and capture screenshots from iPhone and Android emulators (not physical devices). It does not place the results in a frame, add text or background images, or upload assets to any app store.
Known issues
MissingPluginException(No implementation found for method captureScreenshot on channel plugins.flutter.io/integration_test)
See flutter/flutter#91668. You’ll need to open flutter/packages/integration_test/ios/Classes/IntegrationTestPlugin.m and change the registerWithRegistrar method to the following:
+ (void)registerWithRegistrar:(NSObject<FlutterPluginRegistrar> *)registrar {
    [[IntegrationTestPlugin instance] setupChannels:registrar.messenger];
}
Yeah, I know. Go thumbs-up the issue.
Development
Build autogenerated JSON maps:
dart run build_runner build
Acknowledgments
Heavily inspired by flutter_launcher_icons.


