PixelSnap – Sharp looking applications at any pixel scaling factor
If you have ever run a Flutter application on a system with non-integral pixel scaling, such as Windows at 150%, you may have noticed that your beautiful Flutter application suddenly looks blurry. But why? You’re not using any bitmaps, Flutter draws everything with vector. So where’s the blurryness coming from?
Logical vs Physical Pixels
The Flutter coordinate system uses logical pixels, which means that all paddings, insets, sizes, and border widths are specified in terms of logical pixels. The display however, is make of physical pixels and the ratio between logical and physical pixels is called pixel device ratio. If device pixel ratio is 1, one logical pixel represents exactly 1 physical pixel. If the device ratio is 2, one logical pixel will translate to two physical pixels.
The problem arises when the device pixel ratio is not an integer. In this case, a logical pixel with a ratio of 1.5 will result in 1.5 physical pixels. A line with a logical width of 1 pixel will render as 1.5 physical pixels wide. Because it is not possible to lit up fractional values of physical pixels, the line will be anti-aliased and thus will look blurry.
1px border being blurry at 150% pixel scaling.
Non integral pixel ratios are very common on Windows. If you’re developing your application on a Mac with 2.0 scaling (which is probably the most forgiving one), you might not even be aware that you have a problem until you run your application on a Windows machine for the first time.
| 2px stroke aligned to pixel boundary | 2px stroke not aligned to pixel boundary |
|---|---|
How do we solve this?
By trying really hard to make sure that everything lands on physical pixel boundary of course 🙂
Let’s say that you have 125% scaling and want to draw border that will be exactly 1 physical pixel wide. You can’t just set the border width to 1 logical pixel, because that will result in 1.25 physical pixels. Instead, you need to set the border width to 0.8 logical pixels. This will result in exactly 1 physical pixel.
You will need to do the same thing with padding, insets and any kind of explicit size that you have.
But that’s not enough. In additon you’ll need to make sure that:
- Any kind of widget that sizes itself needs snap the size to physical pixels.
- Any widget that positiones children (i.e. Align, Flex) needs to make sure that the child will land on physical pixel boundary. For example centering widget in Flutter can sometimes result in blurry child even at 100% scaling, because the child may be positioned at half physical pixel.
- Layout widget that fills area with multiple children needs to make sure that children sizes are properly snapped to physical pixels, while ensuring that the area is covered. If you have row with 3 children filling 100 physical pixels, the children will need to be sized at 33, 33 and 34 physical pixels exactly.
- Whenever the device pixel ratio changes, you need to recompute the layout to ensure that the conditons above are met.
PixelSnap for the rescue
Doing all these things ad-hoc and manualy would by a lot of work and possibly very error prone. Fortunately, you don’t have to. PixelSnap can help in multiple ways:
Extension methods for easy pixel snapping
You can use the pixelSnap() extension method to pixel snap numeric values, Size, EdgeInsets, Rect, Offset, Decoration and other basic Flutter classes.
For example:
    final widget = Container(
        width: 10.pixelSnap(),
        padding: const EdgeInsets.all(10).pixelSnap(),
        decoration: BoxDecoration(
            border: Border.all(
                width: 1.pixelSnap(),
                color: Colors.black,
            ),
        ),
    );

    // You can use .ps shorthand for numeric values.
    final width = 10.ps; // same as 10.pixelSnap()
Pixel-snapped widgets
Now this already looks like an impovement, but still seems very manual. And what about layout? How will this help with Align, Row or Column? Sure we can do better?
Why yes, we can. PixelSnap comes with thin wrappers around many Flutter widgets that already do the pixel snapping for you. To use this, simply import
import 'package:pixel_snap/widgets.dart';
instead of the standard
import 'package:flutter/widgets.dart';
This replaces some of the basic Flutter widgets with pixel-snapping alternatives and reexport all other Flutter widgets.
If you’re using material or cupertino import this instead:
import 'package:pixel_snap/material.dart';
import 'package:pixel_snap/cupertino.dart';
Note that this will reexport the original (unmodified) material and cupertino widgets in additon to the pixel-snapped alternatives to standard widgets.
With this in place, the example above can be rewritten as:
    final widget = Container(
        width: 10,
        padding: const EdgeInsets.all(10),
        decoration: const BoxDecoration(
            border: Border.all(
                width: 1,
                color: Colors.black,
            ),
        ),
    );
This import will also give you modified Flex, Row and Column widgets that will ensure that the all children are properly pixel-snapped.
Here is list of Widgets that has been amended to pixel-snap automatically:
- Column
- Text
- RichText
- Center
- FractionallySizedBox
- Align
- Baseline
- ConstrainedBox
- DecoratedBox
- Container
- FittedBox
- IntrinsicWidth
- LimitedBox
- OverflowBox
- Padding
- SizedBox
- SizedOverflowBox
- Positioned
- PhysicalModel
- CustomPaint
- Icon
- Image
- ImageIcon
- AnimatedAlign
- AnimatedContainer
- AnimatedCrossFade
- AnimatedPositioned
- AnimatedPhysicalModel
- AnimatedSize
If you stick to these, you application should be pixel-perfect with very little additional work.
-
If you’re need to use Widget that sizes itself, you can wrap it in a
PixelSnapSizewidget. This will extend the size of widget to nearest physical pixel and thus ensure that this widget, when put in your pixel-snapped widget hierarchy won’t disturb the overal layout. -
If you are using foreign widgets that are not physical pixels aware but are customizable enough so that they let you specify padding, insets or border, you can use the
.pixelSnap()extension method to pixel snap them.
Simulating different device pixel ratios
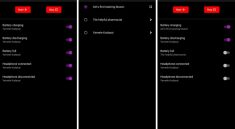
PixelSnap comes with PixelSnapDebugBar widget. You can put it above your applicaiton widget (it should be the top level widget) and it will give you a bar that can be used to switch between simulated device pixel ratios and turn pixel snapping on and off.
See the example app for more details.
Screenshot of
PixelSnapDebugBarin action. The image might be displayed blurred, but the actual application has perfectly sharp 2px wide border lines on simulated 1.75x device pixel ratio.
Same application with pixel snapping disabled. If you zoom-in, you can see that instead of sharp 2px black borders, most of the lines are 3px with varing shade of gray (due to antialiasing).
Pixel snapping function
The default pixel snapping function was chosen to give the following result:
| Logical pixels | Scaling Factor | Physical pixels |
|---|---|---|
| 1 | 1 | 1 |
| 1 | 1.25 | 1 |
| 1 | 1.5 | 1 |
| 1 | 1.75 | 2 |
| 1 | 2.0 | 2 |
| 1 | 2.25 | 2 |
| 1 | 2.5 | 2 |
| 1 | 2.75 | 3 |
| … | … | … |
Other considerations
Pixel snapping and arbitrary transform
In Flutter, render objects do not generally know their position on screen during layout. For pixel snapping to work, the render objects can not have an arbitrary scale / rotation transform in their ancestor. And all the translation transform must be properly pixel-snapped.
This should not be a problem in practice. Desktop application are generally not using arbitrary scale / rotation transforms, and if they are, they are usually localized and only used during temporary events such as transitions.
Using pixel snapping with arbitrary transforms will produce a result that is “slightly wrong”, but since the transform likely shift things outside of pixel boundaries anyway, the distortion should be hard to notice.
Rebuilding after changing device pixel ratio
PixelSnap will detect change in device pixel ratio and force reassembling of entire application. Because there are potentially many calculations requiring current window device pixel ratio, obtaining the ratio through MediaInfo.of(context) is too expensive. It is also inconvenient (we need the ratio during layout in render objects and in extension methods). Bypassing MediaInfo means that Flutter does not know which widgets depend on device pixel ratio, so we end up rebuilding of entire tree.
This is not ideal, but changing device pixel ratio already is an expensive operation so the tradeoff seems acceptable. Possibly missing animation frame in situation while window resizes as it is moved across monitors doesn’t seem like a big issue.


